Assembling the pieces was quite straight forward and they all fit snugly
together. I needed to scrape off paint on every joint of the tank’s support
structure to ensure the pieces slid completely into each other. For the
roof, I painted it flat black then dry brushed it with satin aluminum enamel
paint. I finished it with orange powdered pastels to represent the presence
of rust. Once the entire structure was together, I weathered it with various
powdered pastels and sealed everything with 2 coats of Testor’s
dull-coat.
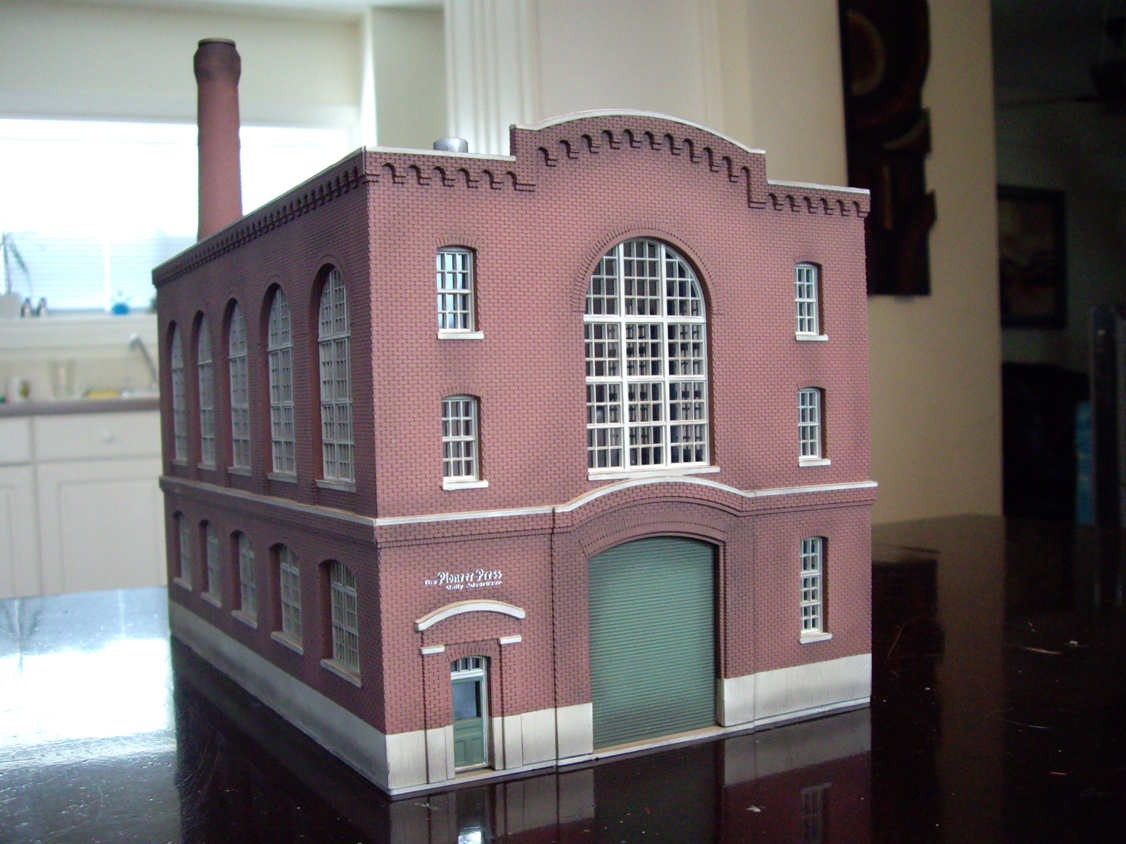
One of the last and largest structures for my layout is my Walthers
Cornerstone Northern Light & Power kit. I immediately fell in love with
this model due to its style and large, round-top windows. The building will
be installed in the vacant space between the track leading into the right
lower mountain tunnel portal and the road passing around the turn-table
area. Instead of a power plant, the Pioneer Press Daily Advertiser will be
the tenant. The model will be complete with custom lighting and a printing
press. I’ve always had an interest in press-printing and journalism and
because I already had the company name on a Woodland Scenics dry-transfer
sheet, I thought it was a good fit.
Like all Walthers Cornerstone kits, all pieces are precision molded with
quality materials. Besides the 4 walls, roof, one-piece chimney, and base
pieces, the kit includes an under-track hopper kit, roof support trusses, an
internal firewall, roof vents, and separate windows and doors. I always
prefer detached windows and doors as they make painting much easier and
convenient as there is much less masking required. I carefully cut each
piece off its plastic carrier structure and trimmed and sanded off any
spurs. I then washed each piece in warm, soapy water. This step is always
very important for proper paint adhesion.
I started by carefully assembling the 4 main walls, ensuring the structure
was kept level and the walls joined at a perfect 90 degrees. I painted the
main structure with brick red Humbrol enamel, thinned 3:1 with paint
thinner. I also used the same paint colour on the chimney and firewall
pieces. At the same time, I sprayed the windows and doors with Testors light
aircraft gray. I didn’t remove the windows at this point from their carrier,
making them much easier to paint in one easy step. Other small components
such as the roof vents and trusses were painted with metallic aluminum
paint.
After the main structure dried for 24 hours, I masked the entire building
to prepare for painting the trim and foundation. I used the same light
aircraft grey colour that I used on the windows for the trim, which took
about three coats as I was brush-painting them. Once the trim had completely
dried, I made any necessary touch-ups with either the brick red or light
aircraft grey paint using a fine detailing brush. I then weathered the
entire building with powdered pastels and sealed it with two coats of
Testors Dull-Coat.
I felt that the roof pieces lacked detail so I used trip styrene to make a
paneled look. I first divided each roof panel into four equal sections and
glued on 1mm x 1.5mm strip styrene. I then glued a piece of the strip
styrene along the total length of the edge of one roof section. I made sure
this piece overhung the roof panel slightly, thus covering the gap between
the two roof sections once they were assembled on the structure. The entire
roof was then spray painted flat black.
For the large double door, side entry door, and overhead bay door, I used
dark green enamel to add a bit more interest to the colour scheme of the
building. I masked off the door frames and transoms so they would remain the
light grey colour I had originally coloured them. The last step was to
weather the doors with dark powdered pastels and seal with a final coat of
dull-coat. The windows were also weathered and sealed with the same
method.
The window glazing included with the kit is thick and oddly obscure, so I
opted to use clear styrene from Evergreen. This product is thin and almost
perfectly clear so it looks a lot more like real glass. After removing each
window from its carrier, I carefully glued it to a clean sheet of the clear
Evergreen styrene. I glued each window side by side to get as much use out
of the styrene sheet as possible, leaving only a large enough gap between
each window to accommodate a razor blade. After the glue had dried, I
carefully cut each window with a sharp hobby blade and trimmed off any
overhanging styrene. This process was very quick and before I knew it, I had
a nice pile of glazed windows ready for installation.
Before installing the windows, I painted the interior walls with dark grey
enamel. I also scraped the paint off the surfaces of the windows and window
openings where glue would be applied for better adhesion. I then applied a
small bead of glue around each window and mounted it to the inside of each
opening, pressing down for several seconds to ensure it was properly seated.
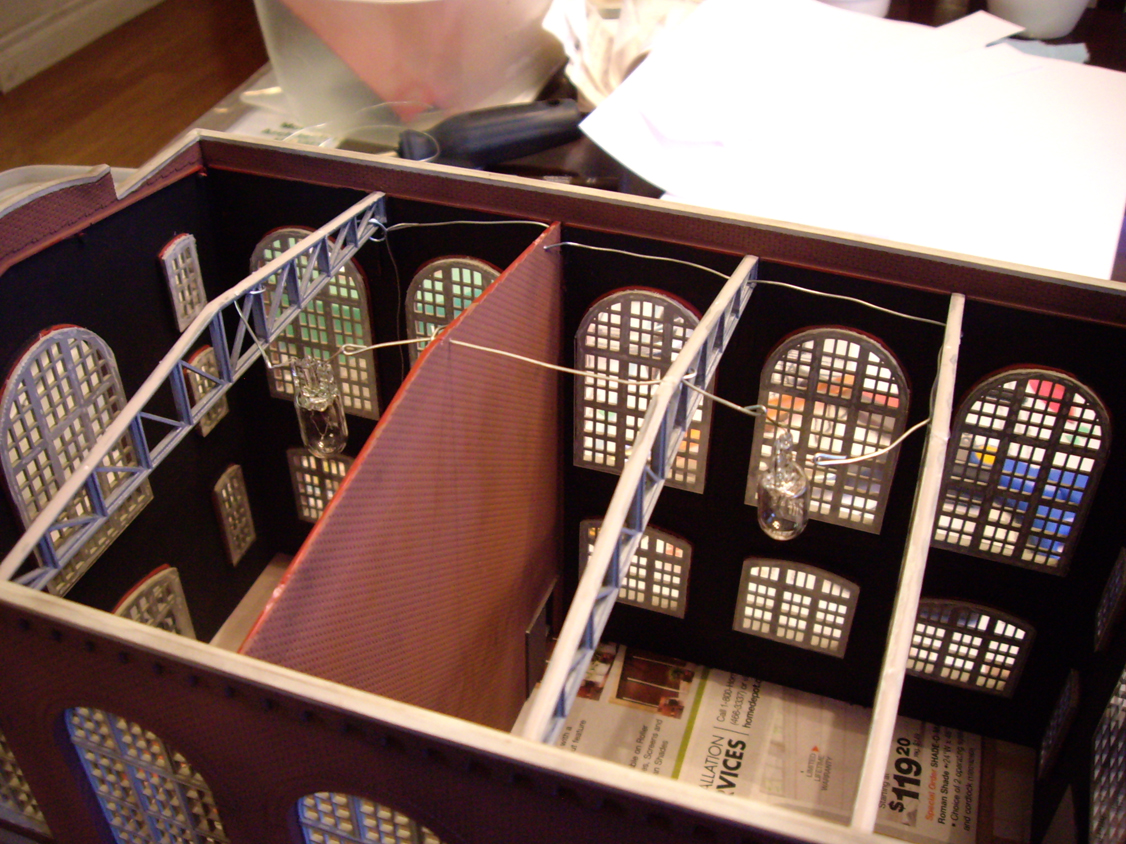
Once the windows were all installed, I added the three roof support trusses
and the interior wall. Though the interior wall could be optional, there is
no additional roof truss to replace it if it isn't used.
Lighting was next. I didn’t use the styrene light diffuser box method used
in previous models due to the fact that this building’s interior is
completely open and visible due to the large amount of windows. I instead
wired two automotive 12v bulbs between the roof support trusses using rigid
steel wire to support each bulb. I originally wired the bulbs in series but
changed to a parallel circuit as they were too dim. The wire leads run down
the back wall and exit out of two small holes in the foundation.
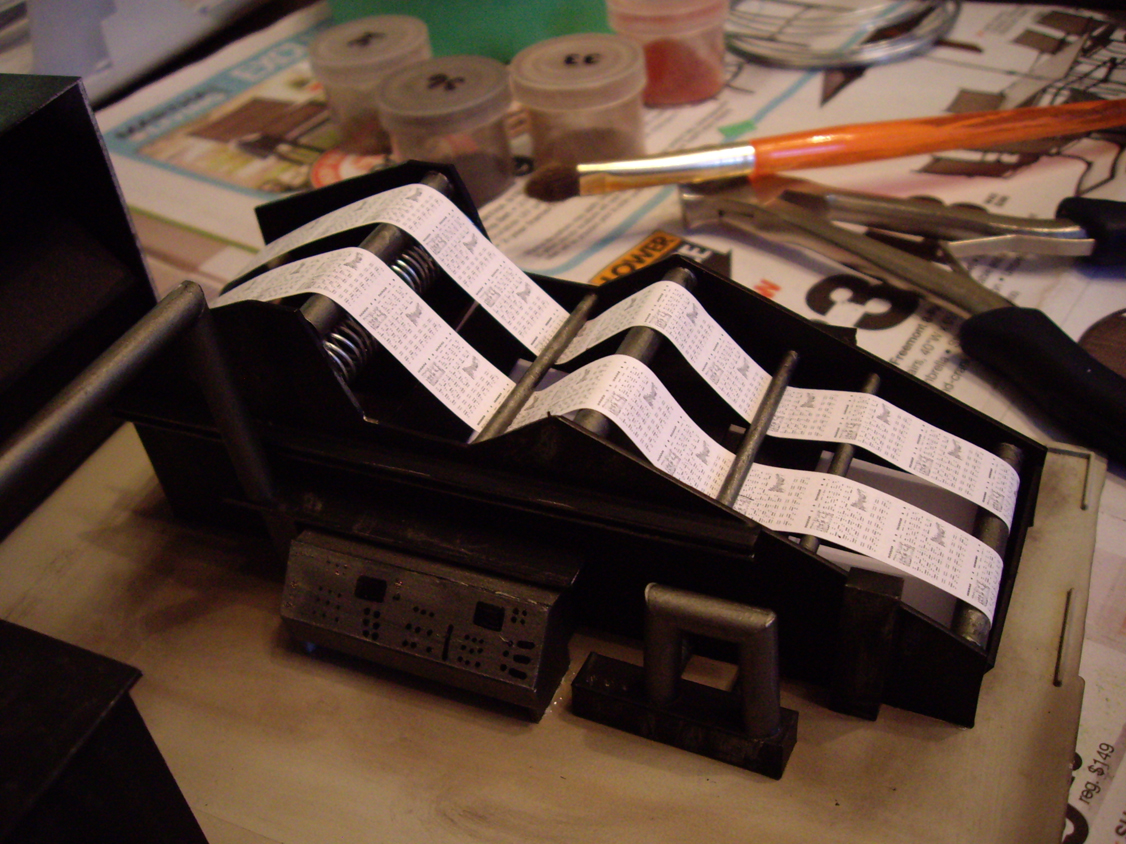
The interior was quite a lot of fun to build. A staple piece of equipment
for any press company is the printing press, so I immediately went to work
scratch building it scrap styrene. Once the press started to look somewhat
realistic, I sprayed it flat black and detailed it with metallic aluminum
rollers and highlights. The final and most imperative detail was the print
itself, which I created in Photoshop and printed as a long strip on standard
printer paper. I then glued 2 printed strips directly to the press, weaving
it in between the rollers.
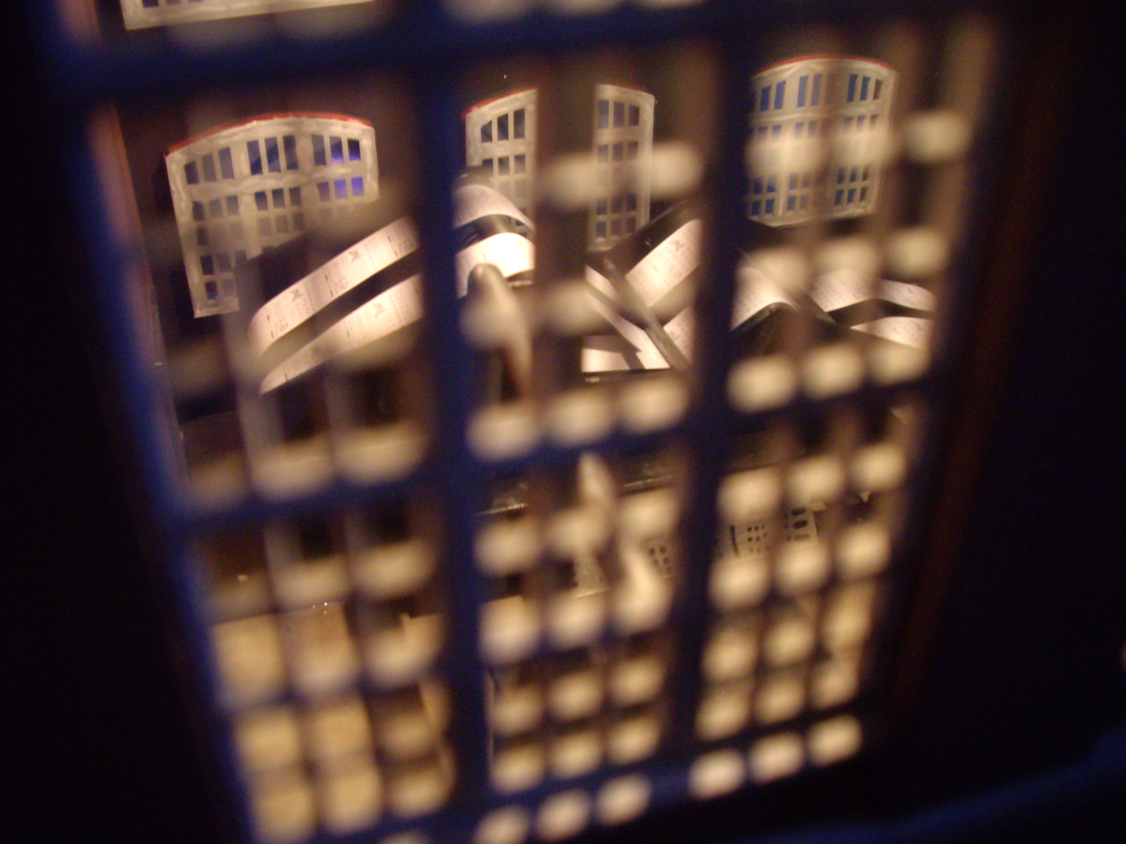
The remainder of the interior is mostly just random pieces, shapes, and
parts thrown together in an attempt to make it industrial and factory-like.
The large box structure with the grate on top sits behind the interior wall
and serves to fill the large void. Its purpose is completely up to the
imagination! Just remember, the interior will be mostly out of view but
getting just a glimpse of any interior parts scene makes it entirely more
realistic and believable to the viewer.
Finishing the roof was the last step. I glued on the vents and added
weathering effects. My first attempt at weathering with powdered pastels
failed as they almost completely dissolved when I sprayed them with
dull-coat. I instead opted for dry-brushing the roof with steel and rust
enamel paint. Last, I placed the two roof panels to the main building. They
sit snugly on the roof trusses so there is no need to glue them. This allows
future access to the interior.
This kit was undeniably a lot of fun to build. It is currently the largest
structure I have ever put together. I might still be able to fit one or two
very small structures on my layout but definitely nothing as large as this
one. I must say that the feeling is almost bittersweet that this kit is
finished. Guess I will just need a larger layout.
I’ve accumulated a small collection of scrap styrene over the last year or
so, mostly from bulk bags of assorted styrene pieces from Evergreen. A
couple of the larger scraps I had consisted of various corrugated patterns,
so I decided to try my hand at building an entirely scratch-built structure.
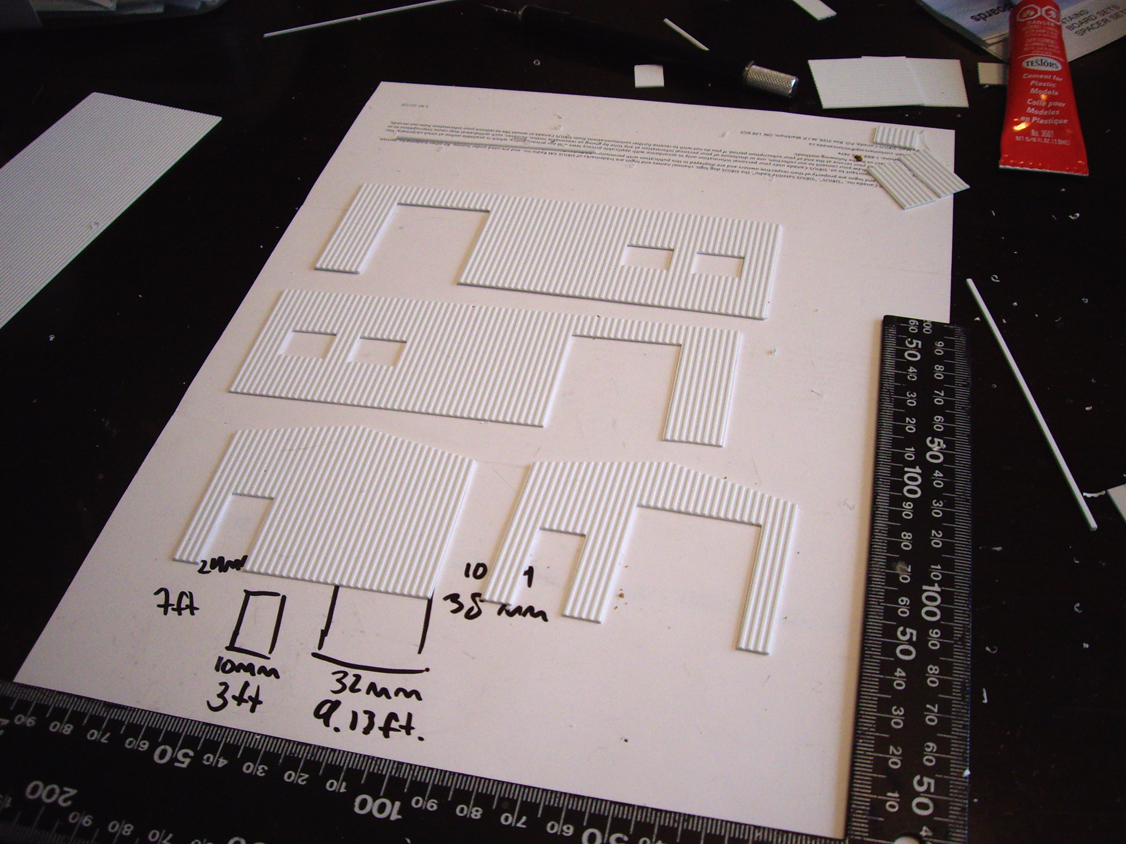
I decided to keep the design simple for my first attempt. I planned out a
small garage/workshop measuring about 2.5” x 5”. The design includes three
overhead bay doors, four office windows, and two single entrance doors.
There are also two small windows on the front and back. I kept the size of
the building to a minimum as my layout is quite limited for real estate at
this point.
I started by first planning the design of my building on paper, noting the
real-life dimensions of each wall, door, window, and the roof. I then
converted these measurements down to HO scale. Using a new blade, I
carefully marked the measurements on the backside of the styrene sheet and
scored the outline of the wall using a straight edge. I used a square and
ruler to double check the measurements after every score line I made,
ensuring that the walls were kept square and equal. I then gently flexed the
styrene to break each piece apart. I fixed any rough edge with sand paper
and a hobby knife.
The overhead doors were cut from scrap v-groove pattern styrene and the
entry doors from standard smooth styrene. For the main entry door, I cut a
half-length opening for a window and added strip styrene for the insert
trim. I masked the very outside edge of all the doors so I could easily add
glue to these unpainted areas when attaching the doors to the backside of
the walls. The doors were then all sprayed with light aircraft gray
paint.
I hand painted the corrugated steel walls with a mix of blue and steel gray
enamel paint, mixed 1:1 with thinner. After letting the three coats of paint
dry for 24 hours, I glued the overhead and entry doors to the backside of
each wall. I then added trim to the doors using 1.5mm x 1.0mm strip styrene.
I used the same strip styrene for the window frames and on the base of the
building to represent a foundation.
I then glued the four wall pieces together. I added extra styrene support
pieces to the interior for extra rigidity. The roof was a single piece of
v-groove styrene, scored and carefully angled down the center to fit the
slope of the building. After airbrushing the roof a light gray, I carefully
glued it to the main structure. After making a couple touch-ups to the paint
and trim, I weathered the walls, doors, and roof with a variety of powdered
pastels. Lastly, I sealed all the weathering details with two light coats of
dull-coat.
Once the structure was dry, I added clear styrene pieces to the backside of
the walls for window glazing. The final step was to add a black paper
divider and floor to the interior of the so no white plastic could be
visible through the windows. I am quite happy with how this little project
turned out and can’t wait to mix it in with my other model buildings.
Cutting's Scissor Co. Kit by DPM Landmark Structures
By Ty’s Model Railroad - 3/28/2012 11:21:00 PM
The Cutting’s Scissor Co. kit is my second structure kit from Design
Preservation Models. My layout does not have much more room for commercial
or residential structures, but I do require a couple more industrial
structures to fill some empty real estate. I started by removing any edge
spurs left from manufacturing with a sharp knife and sanded the edges of the
wall pieces so they were a perfect 90 degrees. This ensured a good fit when
gluing the model together. This step is required on most DPM kits as the
structure joints are not at a perfect 90 degrees and constructing the model
without sanding will result in large gaps in the corner joints.
After sanding the required pieces, I washed them in warm, soapy water to
remove any oils that my hands may have left on them. Once dry, I glued the
walls carefully together on a level surface, ensuring the wall pieces fit
together perfectly and evenly. I made sure each corner was square by using a
square wood dowel on the inside of each corner joint.
Once the structure had dried for an hour, I cut 2 roof sections from a
sheet of supplied styrene. I also glued on the roof supports which were also
supplied in the kit via a bulk length of strip styrene. I did not glue the
roof panels on at this point as I needed the roof open to add window glazing
and interior details later on. The kit also calls for awnings over the
loading bays using a leftover piece of styrene from the roof structures. I
opted for a textured styrene awning that I had left over in my scrap bin,
which looked more authentic. I also added horizontal supports for the
awnings using narrow strip styrene.
After two coats of brick red paint had dried, I masked the structure so I
could paint the building trim, windows, and doors. Masking takes time, and
as hard as I try to paint free hand, I can never achieve the same crisp
lines and accuracy as I do when I mask. I use a small flat head jeweler’s
screwdriver to press the masking tape into tight corners and on narrow edges
to make sure paint doesn’t bleed underneath. Bleeding paint isn’t 100%
avoidable, but is easy enough to touch up in the final steps of
painting.
Once the model was painted, I weathered it lightly with pastel powder and
applied a dry transfer decal (Velikovski’s Distributors) to the exterior
wall. The last paint layer was a final spray of dull-coat to seal everything
in. I applied clear styrene for window glazing then cut and applied printed
paper blinds to the inside of the windows
(click here for my printable blind templates).
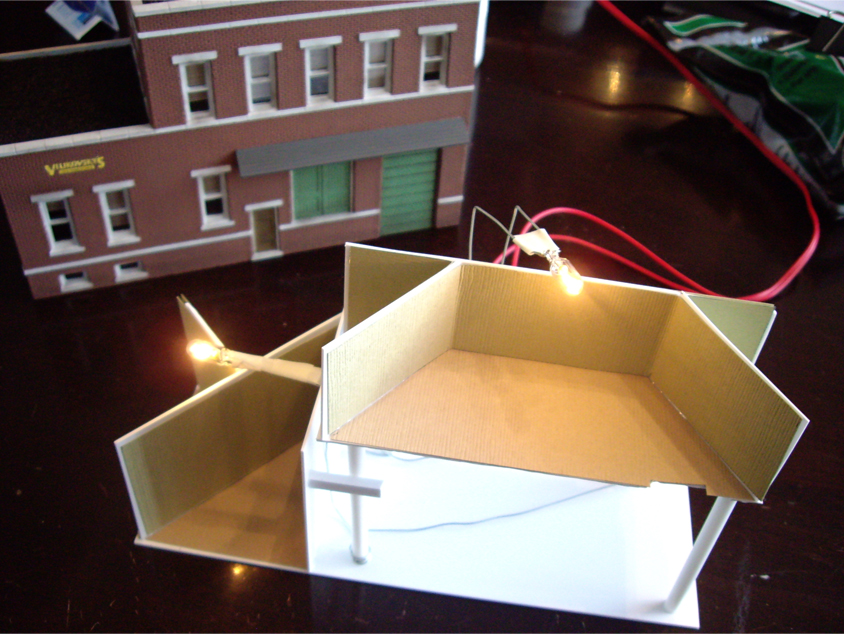
As most previous structures I have built, the interior is completely
removable from the building structure. By simply sliding the exterior shell
off, I can easily access the lights and add interior details in the future.
The interior structure is built in such a way that once fully inserted into
the building’s shell, the building looks as if it is full of separate rooms
when looking through any of the small windows. This prevents a 'see through'
look. Craft paper was used for texture and colour on the floors and
walls.
Two small automotive bulbs light the structure. Since the interior walls
only rise as high as the tops of the windows and don’t go right to the roof,
I installed the bulbs above the interior rooms so one bulb could light
multiple rooms. Aluminum foil installed on the underside of the roof
structure helps reflect the light downward into the rooms and keeps heat
from melting the roof structure. I used narrow bare steel wire to supply
power to the bulbs. I also used this type of wire to support the bulbs so
they wouldn’t have to be attached directly to the styrene structure. Just be
careful the bare wires don’t get crossed or you will have a nasty short on
your hands.
The last step was to attach the roof structures to the model. Once the
styrene roof was glued to its supports and had dried, I applied a thin layer
of medium cinders on top of the roof and leveled it with a folded piece of
paper. Using a small pipette, I gently soaked the cinders with isopropyl
alcohol. I then used the a pipette to apply white glue thinned with water.
After drying overnight, the cinders were securely fastened to the
model.
With a 4’ x 8’ layout, there is very limited room for structures,
especially after you factor in track space and terrain. As I don't have
the real estate for a full-sized town and residential areas, I instead
have to represent these zones with only one or two structures. For the
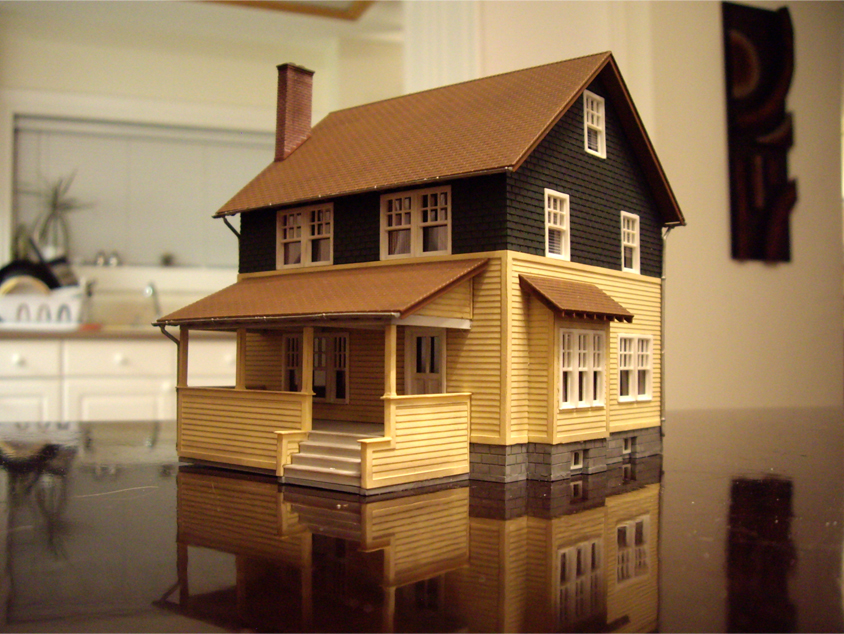
residential aspect of my layout, I have room for one house. For this I
chose the Kate’s Colonial Home kit by Atlas.
I liked the buildings yellow and forest green colour theme so I used very
similar colours when I painted the exterior. I did however change the roof
shingle colour to a dark brown instead of the recommended light grey. The
great thing about Atlas kits is their injection mold process results in high
quality, detailed, and precise parts that fit together easily with little to
no prep work.
The window coverings are printed on photo paper which I glued to the inside
walls. Because I wanted to light the house, I had to add a layer of dark
cardstock to the inside of the walls so light wouldn’t shine through the
plastic wall. To light the structure, I used the same method as in my
Walthers Merchant’s Row I kit by building a small light diffuser box out of
styrene. I built the interior walls around the light box with thick
cardstock, allowing light to glow through small doorways.

Once the first floor was completed, I added a styrene floor for the
second level. I used the same cardstock wall method that I used for
the first floor, building around the light diffuser box. I then
added a cardstock ceiling to the second floor rooms to prevent any
light from glowing though up to the attic windows and into the roof
section. This ceiling can be removed (along with the actual roof) to
access the light diffuser box in the event of a burnt out
bulb.
The kit was weathered using a semi-soft paintbrush and dry pastels
that I ground up into a fine powder. I made sure almost all of the
pastel was off of the brush before applying it to the building as it
isn’t very forgiving. A final spray of Testors dull coat sealed in
the pastel weathering. The chimney and foundation mortar were
coloured using thinned black and white washes.


