

For my terrain structure, I opted to use the hard-shell method. This
consists of cardboard strips, plaster infused paper towels, and a final
layer of plaster. This seemed to be a popular, tried and tested method. The
materials are very cheap and the end results are very effective.


I first started by cutting several different length strips from a cardboard
box, all between 1/2" and 1" wide. The strips were then bent to the desired
curvature and fastened to the benchwork with either white glue and staples.
I spaced each strip about 1" apart. For most of the strips, I didn’t require
horizontal support strips except where the vertical strips were longer and
tended to sag. Crumpled newsprint under the strips also helped with support
in some areas.

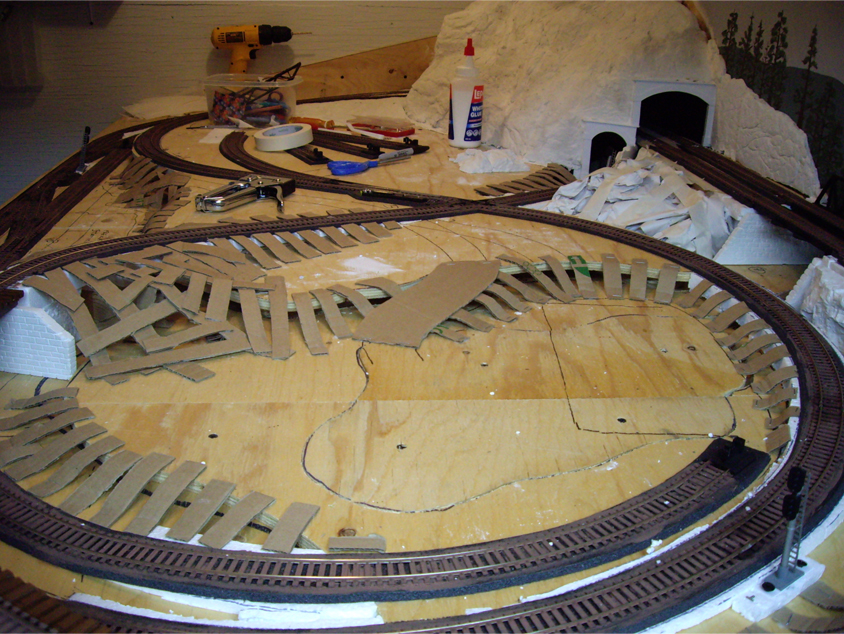
I also incorporated some crock outcroppings that I had cast with plaster.
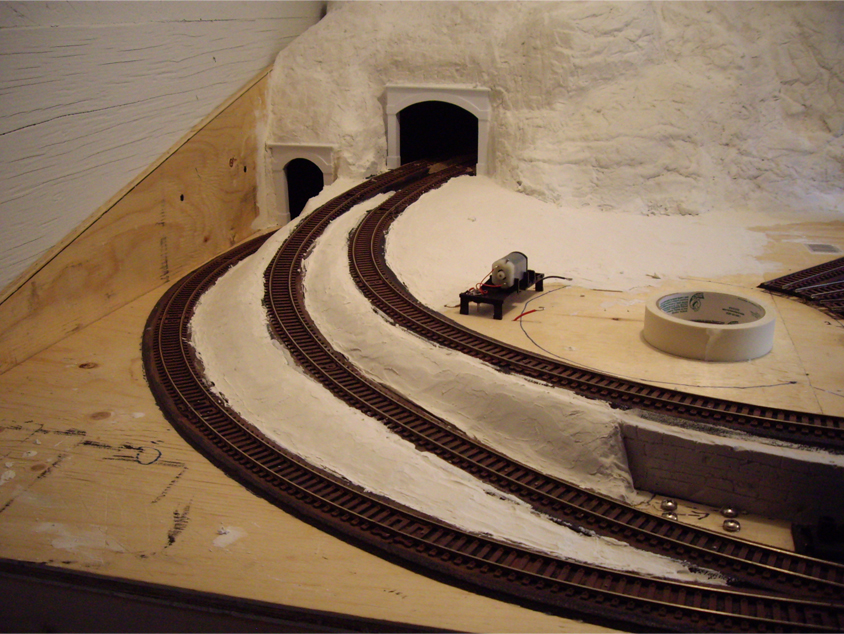
For the more rugged looking terrain features, I used the same crumpled paper
method that I used for my mountain tunnel. For future planned roads, I
simply cut a desired sized piece of cardboard and attached it just as I did
with the other strips, ensuring a smooth grade from the upper level to the
lower ground level.

The next step was to cover the cardboard strips with plaster-impregnated
paper towels. For this, I tore sheets of paper towel into strips at various
widths. Preparing a good mixture of thin and wide strips cardboard strips
makes it a lot easier to cover larger and smaller areas.

I mixed powder drywall compound into a large, shallow container with water.
This took a little trial and error to get the right consistency; if too thin
the paper towel strips will dry and peel and have no rigidity. If too thick,
the paper towel will just rip under the weight. Good quality, brand name
paper towel also helps immensely. I had to keep stirring the plaster mixture
as I worked as the plaster tended to settle to the bottom of the container.
Adding a bit of water to the mixture as I worked will also keep things
flowing.

Once I had found the proper plaster mixture, I dipped in each strip of
paper towel, wiping off the majority of excess plaster from the strips with
my fingers. I then positions the paper towel strips horizontally across the
cardboard strips, overlapping them for added strength. I didn’t worry too
much if the paper towel strips sagged a bit between the cardboard support
strips as this would be leveled off later with the final plaster layer. I
used my fingers to smooth the strips as much as possible.
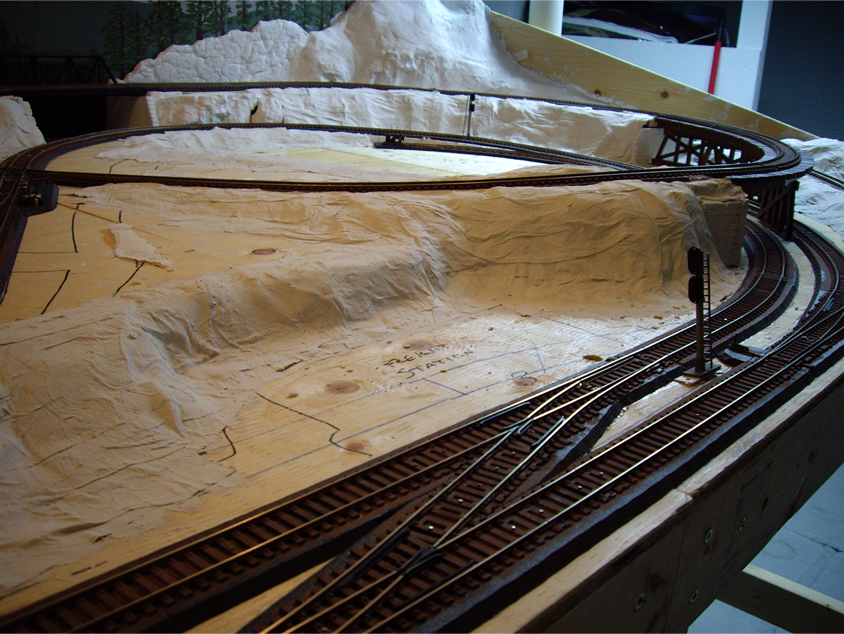
After 24 hours the paper towel shell was dry and I was left with a rigid,
somewhat brittle shell. I then applied a layer of plaster to the shell. This
adds strength to the plaster shell and levels out any seams or sagging spots
that may have formed. I used a gypsum based plaster but made the mistake of
using a pre-mixed product. This is much more prone to cracking and shrinking
compared to dry mix so, I had to go back and fill several cracks that had
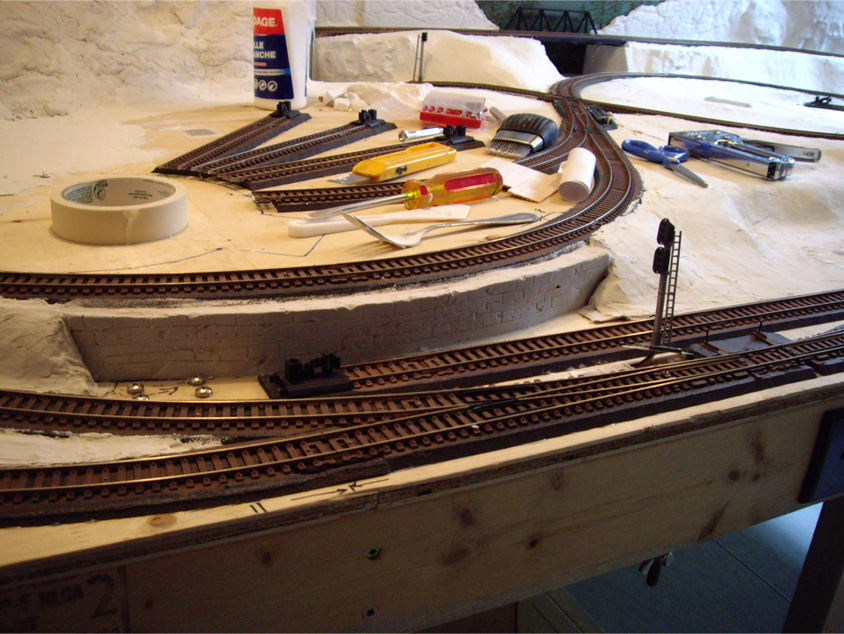
formed. I also cast a retaining wall right in front of the turn table using
a cardboard mold that I made. The wall is cast with plaster of Paris and
detailed with hand carved bricks.
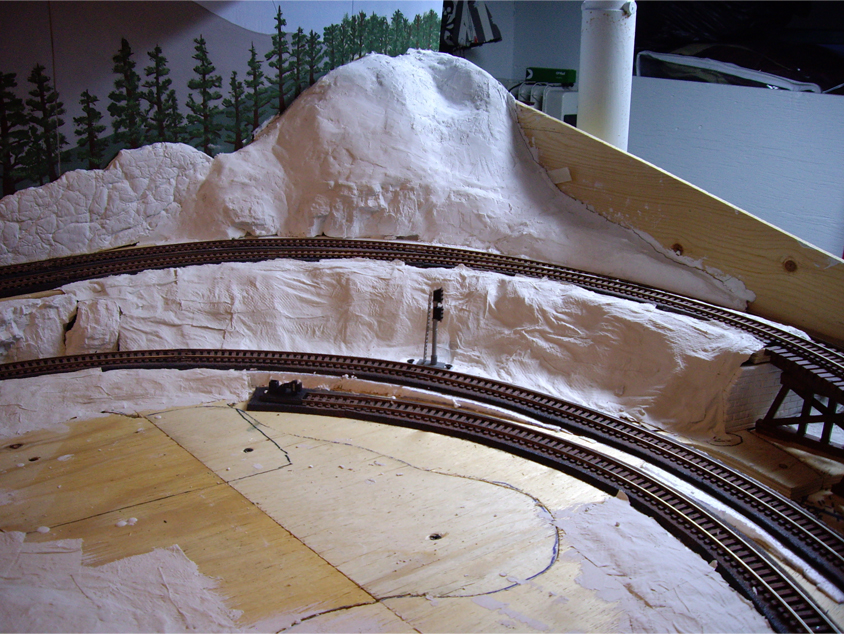
Once the first layer of plaster dried, I spread a second, final layer of
plaster over the entire shell, thicker in some areas to eliminate low spots.
I blended in all of the rock outcroppings and filled in any holes or cracks.
I used a combination of my hands and small plastic spatulas to smooth and
level the plaster layer and blend it with the existing bridge abutments and
terrain. Ground foam and dirt will fill in any deficiencies in the plaster
once it's added. I still have a few things to touch up but I can finally say
that the plaster hard-shell is complete.

9 comments
Enjoying your wonderful blog. I am just starting a new layout. (Had one many years ago before we moved house). My 9 year old grandson is helping me.
ReplyDeleteOne problem I have is that I am trying to keep the weight of the layout to a minimum as it will be stored close to the garage ceiling when not in use. Using a boat winch to raise and lower. Is their any other material I could use instead of plaster of paris?
BTW the layout is 1800mm x 1200mm.
Hello, that's great to hear that you are starting up a new layout with your grandson. I can imagine he is quite excited!
DeleteI would say that the lightest weight option would be to use either a paper mache method using chicken wire or cardboard for support, or solid Styrofoam which you can then carve. A thin layer of plaster on either option shouldn't add much eight and should provide a solid base for your scenery. I think the benchwork itself will be the most concern for weight. Keep me updated on your progress or with any other questions you might have. Thanks.
-Tyler
Hi there,
ReplyDeleteThanks for your quick reply.
I had already started my layout, but on seeing your blog - which I accidentally stumbled on, and I'm glad I did - my plans went out the window!!! :) As I am sourcing my track from eBay, I can't replan it properly at the moment as I currently have a mixture of Hornby, Atlas, Peco and a couple of pieces of Tyco. I need some more straights before I can plan it using SCARM.
I am impressed with your layout so - if you don't mind - I will base mine on it albeit slightly smaller as my base is a bit smaller than yours, I noticed on one of your entries that someone was asking about a copy of the elevations, or something similar. Would that be feasible if you could oblige with the same for me?
Re using chicken wire for support, would plastic/artificial or whatever you want to call it, flyscreen be just as good.
Thanks again for your reply.
OOPS! I omitted to say that my wife and I were in Canada last August, and did the Rocky Mountaineer as well as the Canadian. I was going to incorporate part of the spiral tunnels on my layout, but I figured I don't have enough room. (:
DeleteThanks again.
No problem, I don't mind at all if you base your layout at all. As always, feel free to use, modify, or improve anything that I have done. I'm not sure if the bug screen will provide enough support for the terrain, where as chicken wire is much more rigid. If you used the fly screen, you would have to put a lot of material under it to support it. Keep me updated on your progress, I would love to see some pictures!
Delete-Tyler
Oh, and here is the ling to my layout showing the different elevations. Let me know if you need anything else. Thanks.
Deletehttp://3.bp.blogspot.com/-s9TULwKdIEM/VMbp21KC1xI/AAAAAAAACbQ/HVLOpHHCvEM/s1600/Elevations-%26-Track-Layout.jpg
Hi Tyler,
DeleteJust an update on my plans. I have produced 2 layouts on SCARM, but still not sure which one to use yet. I haven't set my heights as yet, that will be done in the next few days. I have based (plagiarised) on your layout albeit a bit shorter than yours.
I will email you with the layouts.
Thanks again
That's awesome, I look forward to seeing them both.
DeleteAwesoome blog you have here
ReplyDelete