
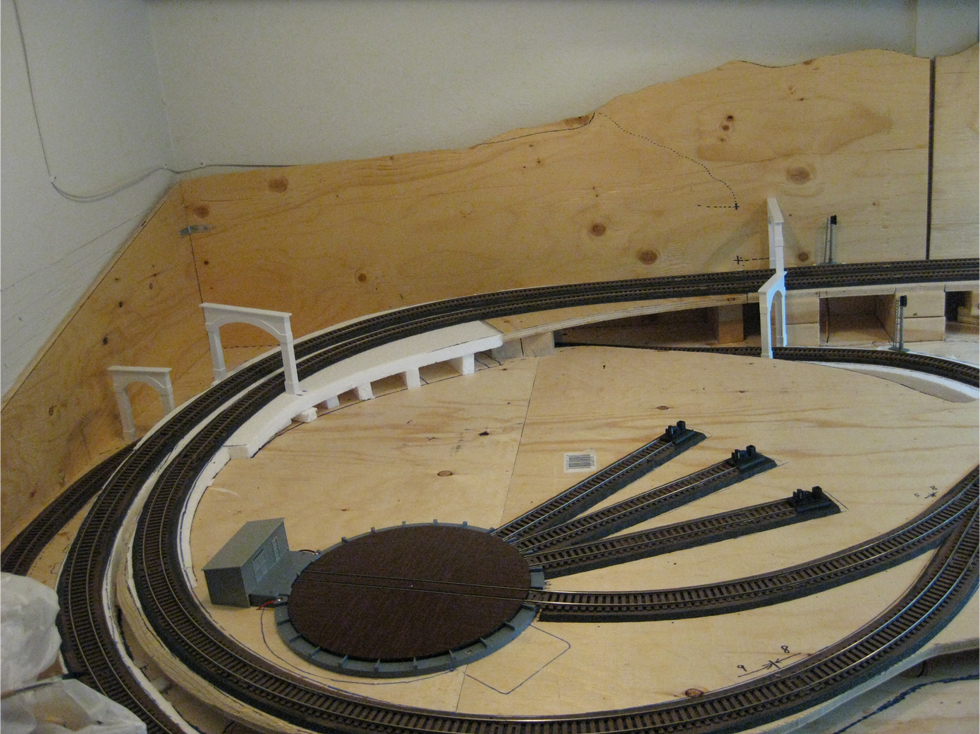
Before I could start the mountain and tunnel, I had to finish the track.
First was paint. I experimented for a few days to find a method that covered
quickly and looked realistic. Since my layout is right beside my furnace and
hot water tank and and lacks ventilation, spray paint and enamels were out
of the question. That left me with hand brushing with water-based
acrylics.
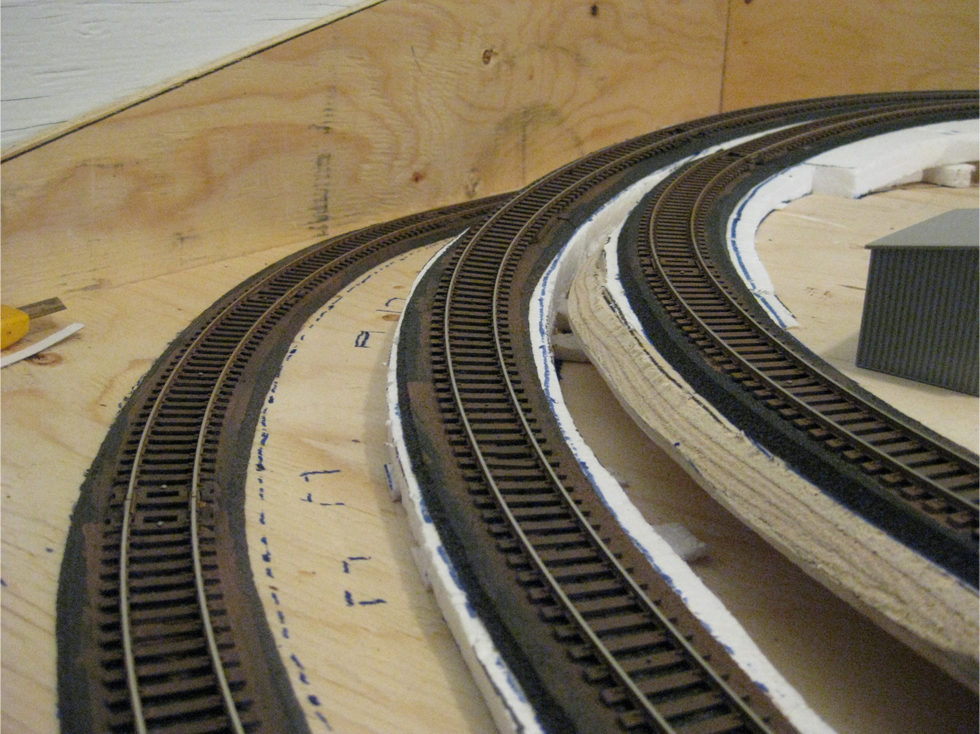
To paint the track I used Burnt Umber acrylic. I mixed it with a bit of
grey and thinned it with 25% water and 25% isopropyl alcohol. This mixture
covered well and dried quite uniformly on the ties and in the webs of the
rails. I had to use extreme caution when painting the turnouts, making sure
I moved them frequently while the paint dried so they didn’t get stuck in
place. Once the paint was dry, I cleaned any paint off the top of the rails
using a fine grit sanding block.


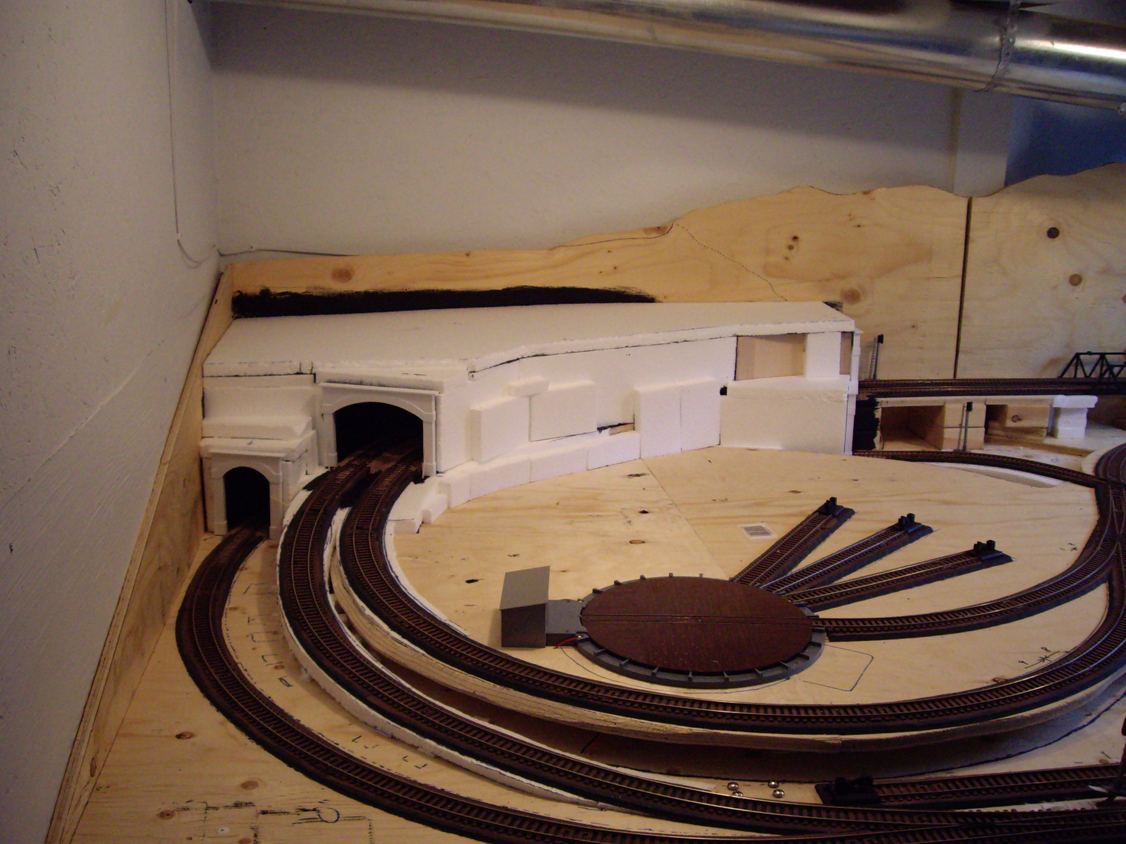
I also temporarily placed my previously built
tunnel portals
at this point. This allowed me to determine the exact location of each
portal and the overall size that my mountain and tunnels needed to be. Due
to spacing limitations, I had to combine the small and large portal on the
tunnel entrances on the right hand side of the mountain. I cut off 1" of the
left base of the large portal and glued it to the top of the right side of
the small portal. This now allows both portals to exist where they were both
intended to be.


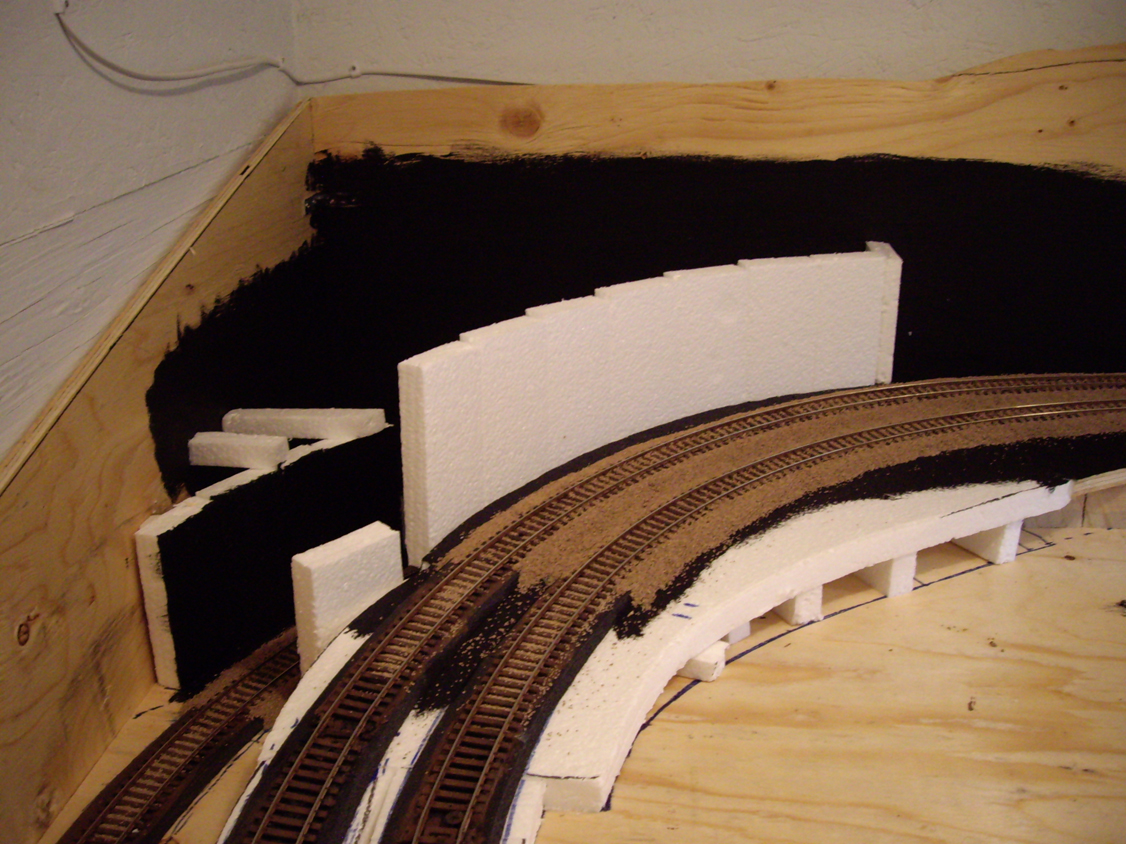
With the track and tunnel portals complete, I could finally start building
the large mountain which the two tunnels will run through. Before I could
build the mountain, I needed to build each tunnel structure which the
mountain scenery will sit on. Each tunnel includes support walls and a
common ceiling which acts as the base for the mountain.
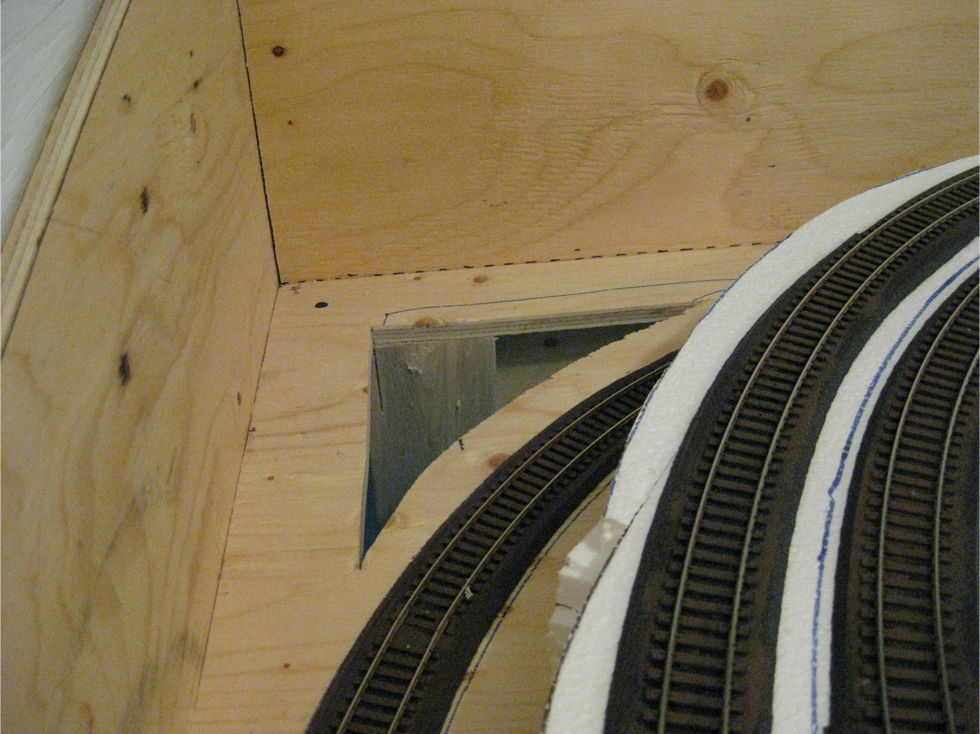
The first task was to add an access point to the lower tunnel to rescue
trains in the event of a derailment. The double wide tunnel is wide and
short enough that I can access the inside from either end. The smaller,
single tunnel which goes under the double tunnel is much longer and narrow
and I cannot fit my hand through the portals. To solve this, I cut an
opening in the benchwork right beside the track, allowing me access the
track from underneath.
To keep the inside of the tunnels as dark as possible, I painted everything
inside with black paint. Since there were sections of tunnel that didn’t
have a complete wall to divide them, it was important that everything was
blacked out so no light could leak through. I used cheap black acrylic paint
from the dollar store, which worked great for this purpose.

I used Styrofoam to start building the walls. I used a combination of white
glue and toothpicks to hold the foam together and keep it in place while the
glue dried. Once dry, each wall section was painted black. I did visual
checks on each end with my plastic tunnel portals in place to ensure that no
wood or white Styrofoam was visible from any angle. If there was, I quickly
covered it with black paint.

It was at this point that I realized that I almost forgot to ballast my
track on the inside of the tunnels! This was an important step as the track
will still be visible for a distance into each tunnel and would look very
odd unfinished. Adding ballast after the tunnels were completed would also
be very difficult.
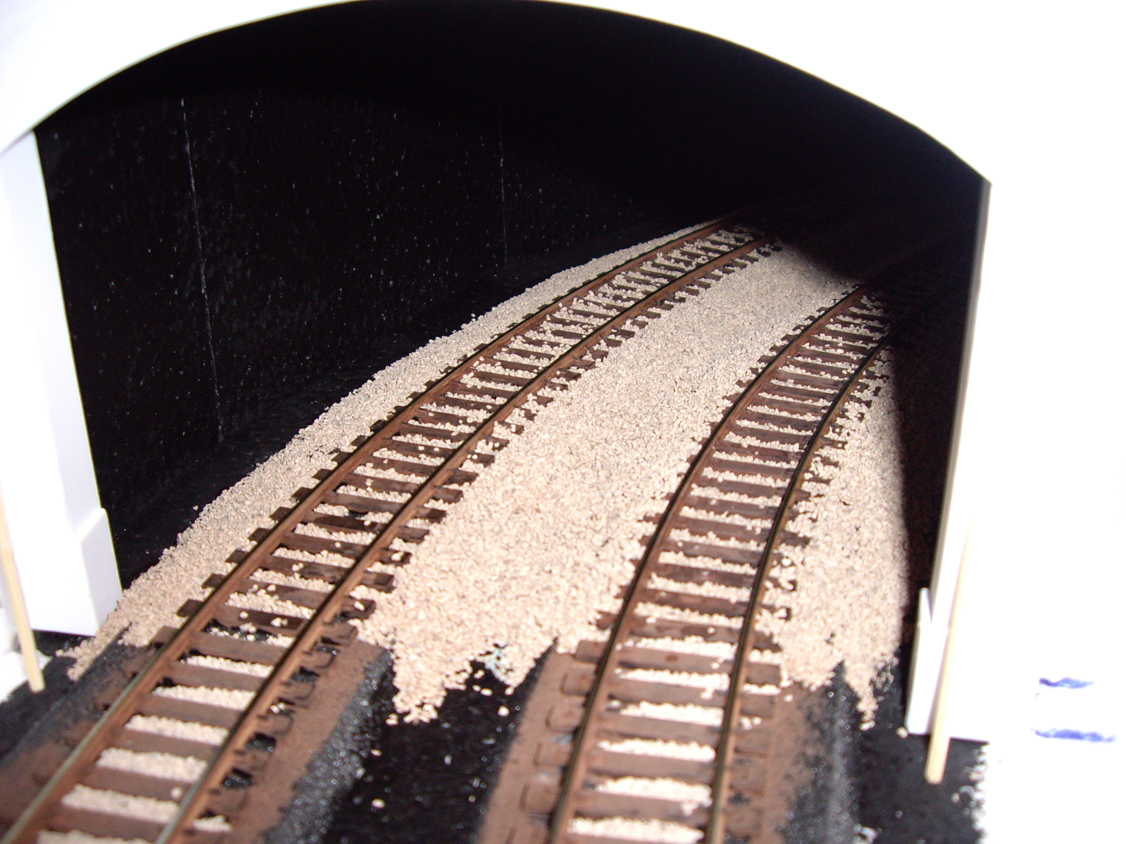
I used Woodland Scenics Medium Buff ballast. This, like most everything
else, was my first time ballasting track. Doing the tunnel sections first
was a great place to start and practice as they will be a lot less
noticeable once the tunnel is complete.

I used a ballasting method that I found to be most popular in my online
research. This method is to lay the ballast on the track and shoulders, then
use a brush to level it between the ties and make it uniform. Using alcohol
and an eye-dropper (pipette), gently wet the ballast. This reduces the water
tension when adding the glue, allowing it to wick better through the
ballast. Once the alcohol soaks in, apply a liberal amount of white glue,
thinned 50% with water and let this soak in as well. Be careful not to add
too much glue at once or your ballast with start to flow away. Once the glue
completely cures (about 24 hours) the ballast will be hard as
concrete.
One thing I learned from this first ballast attempt is to not use too
much ballast. You can always add more but using too much makes things
messy, and it’s almost impossible to brush all of the granules off of the
tops of the ties. Model Railroader Magazine has a really good article in
their February 2011 edition about ballasting track. They explain a
two-part application process of ballasting, where you first apply glue,
then ballast, then re-apply ballast and glue again. This method looks
really nice in the end. I just might try this when I complete the rest of
my track.


The entrance to each portal is the most visible so it was important that
there were complete walls on both sides of each portal. These needed extend
far enough into the tunnel so you could not see that it ended. I places I
didn't have room for Styrofoam walls, I used 1/16” basswood as a divider.
This prevented light from entering either of the portal entrances, showing
through to either the top or lower tunnels.

Once I ensured the tunnel portals fit correctly, I did a final visual
inspection to make sure everything was pitch black inside. I then used a
large template to cut a solid foam roof panel for the entire tunnel
structure. I attached foam supports on the backdrop to support the back and
left edge of the roof structure. I painted the roof and foam supports black
then and glued it into place.

Any gaps were filled in with carefully cut pieces of foam. Upon my final
inspection, there was not a single sliver of light visible inside the
tunnels. Now I have a solid tunnel structure which my mountain can be built
upon without any possibility of affecting the tunnels themselves.


0 comments